Remember my last post? Yeah, that one....the one talking about some level of symmetry? The one that showed two "columns", one of which was a whole lot "skinnier" than the other one? Well, I made a decision to at least try to begin cleaning them up just to see how much rotten "skin" there was to remove on each one.
The fatty was first in line:

Just getting it set up so I could work on it outside was a challenge in, and of, itself. Those little garden carts do have some use after all!
The first thing I had to do was to modify the cart. I'd already set this one up to be able to do small rip cuts with a chainsaw by placing a pallet on the inside rails of the cart and adding some "sides" to the apparatus.


I'm not sure, but I think that root system weighs a TON!
Next step was to start removing the grey matter with my angle grinder and carbide rasp wheel.
More work than expected, but still making progress:

Ok, stand it up to see whether it will actually have a flat enough backside to be able to get it up to the fireplace wall without it tipping forward (Alan and Mendon have small kids, and this thing would squash them flat if it fell on them).
Looking good:

Still looking good from a different angle:

(Editor's Note: The photo above is also the one that got me thinking of going in another direction. The symmetry just wasn't there)
Flat backside still looking good, but, DANG, that charred stuff is daunting!

Truth is, I got disillusioned!
Not only was there more charcoal "stuff" to be removed than I'd bargained for, but the photo below shows just one result of all that "stuff" being thrown every which way by the grinder.
Add the wind into that equation, and, well, you get the picture.
And, that doesn't even take into consideration the caking of charcoal on my clothes! Fortunately, I have a pretty good air compressor I used to blow off most of the charcoal residue before tracking it all over the house in order to take this photo.

The farther I went into that "stuff", the more I realized the core wood was still very good. That, in turn, led me to realize further that the symmetry was going to be "off" if I went with the whole log standing. That, in turn, led me to realize I needed to either find another root system with some symmetry to this one, or I needed to go in another direction.
Whaddya gonna do? WHADDYA GONNA DO?
In discussing this with Katherine, she expressed some concerns about whether or not the "skinnier" of the two columns would even be structurally strong enough to be able to handle the weight of the mantel. She made a very, very good point, for sure.
So, the decision was made to try and do a "Treebeard" type configuration.

This would involve cutting the "fatty" to a much shorter height (with Sampson's help, of course).

And then, finding another root system that had some symmetry comparable to the "fatty", and that could be turned upside down on top of the "fatty" to give it that "Treebeard" look.
This one had promise:

So did this one, but this one also had a LOT more dry rot.


It was then I realized I'd actually need THREE root systems, not just ONE additional system, to make my idea work! Boy, am I ever slow!
Back to the woodpile!
This one looked promising. But, again, a LOT of dry rot.

Rotten into the core.

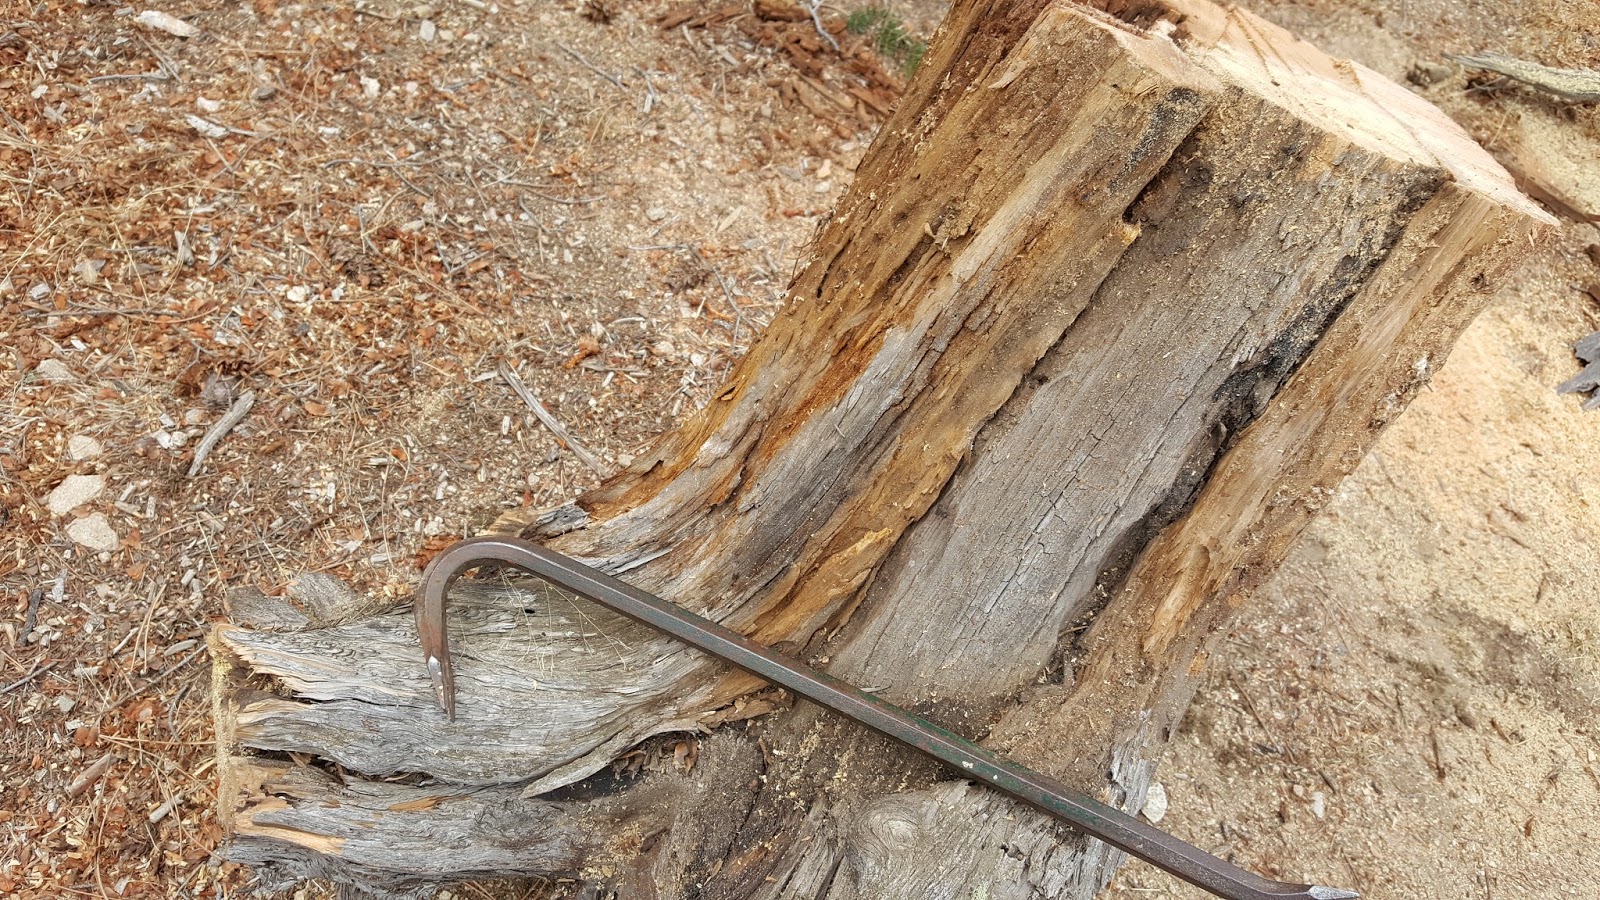
Breaking off pieces that are cracked all the way through. Had to use a wrecking bar to do it.

Now, THAT one had some serious potential!!

And then there were two....


But now I needed two more:
This is the one I just wasn't too sure about. That dry rot actually goes all the way through the log....

Well, I'm gonna try it anyway. The mark on the log in this photo is the height I needed to get the log down to. I'd already done an eyeball type cut with the chainsaw to level it fairly well on the bottom. Just too tired to make that last cut today.....potential accident waiting to happen, so.....

Gonna stop here with this post. Suffice to say, I did find three more stumps I thought would work.
Next up....Peeling Me Some Pine Stumps!