Sunday, September 2, 2012

More cottonwood slabs

Well, I've been hard at it trying to slab up some cottonwood brought to us from a Denver resident who lost the tree in a windstorm three years ago. Yes, he actually delivered them and gave them to us. I'm hoping he sees this post somehow (lost his name and number) because I intend to make him a wine rack out of one of the rounds.


What I'm finding is that crosscutting cottonwood is relatively easy because it's such a soft wood. Ripping is a whole other issue. While the wood is soft, these rounds are so big that a 20" bar barely scratches the surface.


As you can see from the first photo above, the cuts don't even reach half of the way through the log. The log on its side is 4'6" high. Somehow, we need to figure out a way to tip it up on the end in the second photo above to be able to go down through the log from both sides. Haven't figured that one out yet, but am working on it.

These last photos are of smaller logs I plan to work on this coming week to slab by ripping them. They're a lot smaller and easier to handle than that big boy above. Should be able to wind up with some pretty nice table tops out of these ripped slabs. Also noted some spalting in a couple of the slabs I've already cut.


The one with the crack in it above will be cut lengthwise along the crack, and will provide two table tops, each set on two pedastals that will be scribed and carved to accommodate them.

The logs in the second photo above haven't really talked to me yet. They each have some pretty significant voids that will affect what they will ultimately become.

Sunday, August 26, 2012

Brain fart

Don't know if anyone has tried this already, but thought I'd share it anyway.

I've never really cared for the way some craftspeople/artists fasten their tops to the pedestals when doing rustic tables. Most of the time, a separate piece of plywood or scrap wood is fastened to the pedestal with the tabletop then fastened to the separate piece with screws. This method, while effective in most situations, just doesn't aesthetically appeal to me that much. So, I tried something different and am very pleased with the results.

All you need, really is a shelf bracket easily purchased at your local hardware store. The bracket should be a "double" bracket for strength (see picture below). When fastened to the legs of the pedestal with 2-3" deck screws, you can literally pick your piece up off the floor by the bracket. That's how strong this is. In this photo you can see two of the deck screws I used (the other two are hidden by one side of the bracket).


The next step is to rout out a "slot" to accommodate the bracket on the underside of the tabletop. This is probably the most difficult part of the operation, but isn't all that hard, really. I found using another shelf bracket as my guide (first one side of the slot and then the other) works beautifully. A 3/4" straight bit set at the same depth as the thickness of the shelf bracket is all there is to it. Oh, another thing I found that helps is to predrill a hole with a forstner bit to accommodate the router bit (unless you prefer to use a plunge router).


If all goes well with that step, the routed slot should be just right - just like the baby bear's porridge.


Add deck screws (three in this project) underneath to attach the top to the pedestal, and voila -- you have a very stable, strong, and hardly visible, almost hidden attachment for the tabletop on the pedestal. If you look closely at the photo above, you can see one of the pre-drilled holes almost on the end of this bracket (there are three in this bracket - one on each end and one in the center of the bracket). From underneath, all you have to do to attach the top to the bracket is screw a deck screw into each hole. It'll snug up the top to the bracket, and will hold it very securely.


I also thought I'd give epoxy/resin another try on a larger surface. This was the one. Needs another coat, but I'm getting better at this every time I use it. Still have a long way to go, but getting there.

Sunday, August 12, 2012

Doing some damage!

Experimenting with a process can be so much fun. Thinking that pine cones might look really nice for Christmas decorations if they were varnished, some kind of a "drying" jig had to be made. We've also been varnishing aspen leaves to use as appliques on some of the pieces we're making and then coating with epoxy resin.

The picture below is of the jig with pine cones dipped in spar varnish drying.


Deck screws drilled into the bottom of each pine cone provide a very nice handle of sorts for both dipping and hanging from the jig. Bungee cords and clothespins complete the process.

The next photo is of both pine cones and aspen leaves drying at the same time. After the first try it became pretty clear the pine cones didn't require hanging like the leaves, but they did require some kind of pan to dry in. That's where the disposable paint roller pan came in. It actually serves a dual purpose for drips from the hanging leaves and a catch pan for excess varnish coming off the pine cones. Both the leaves and pine cones were finished using a water based polyurethane this time. The hope is this varnish will work as well as the spar because it isn't nearly as toxic (especially the smell).


The final photo below is of the finished pine cones that were done in spar varnish. The results are very satisfactory, but, again, the hope is that the water based works just as well. Will let everyone know when they've thoroughly cured.


Monday, July 30, 2012

Just one of the many reasons why we do fire mitigation!

Through forestry fire mitigation, we learned that by prudently thinning the forests, wildlife would "come back". Have they ever! Here's some of what we've seen since we started doing this.


Bull Elk. Majestic!


Mule Deer. Dad loved watching them.


Black bear tracks (those are my size 14's in the picture). Also have a couple of photos of this bear but can't find them right now.


Chain Saw Carver Attachment for Angle Grinder

Had seen this online, but wasn't sure how well it would work. Happened to see it at Harbor Freight and decided to give it a try. All I can say is WOW! Does it ever remove stock fast. There's a YouTube video of some guy using this without the blade guard. I would definitely NOT recommend this! If that chain were to break or kickback, the hands and fingers will literally be sausage on the arm. Using proper protection, this little gadget is a time saver extraordinaire, unless you have a very small chainsaw you'd prefer to use instead. I highly recommend this attachment for its intended use.


Cottonwood slab being taken down to "planing" width.


Same cottonwood slab with chalk line showing how much of the slab was being removed. 


Same cottonwood slab showing how the wood was removed using a "cupping" motion. Found this to be the easiest way to remove the most stock the fastest instead of always trying to line up each pass in a more or less straight line.


Saturday, July 28, 2012

Pine Beetle Rounds

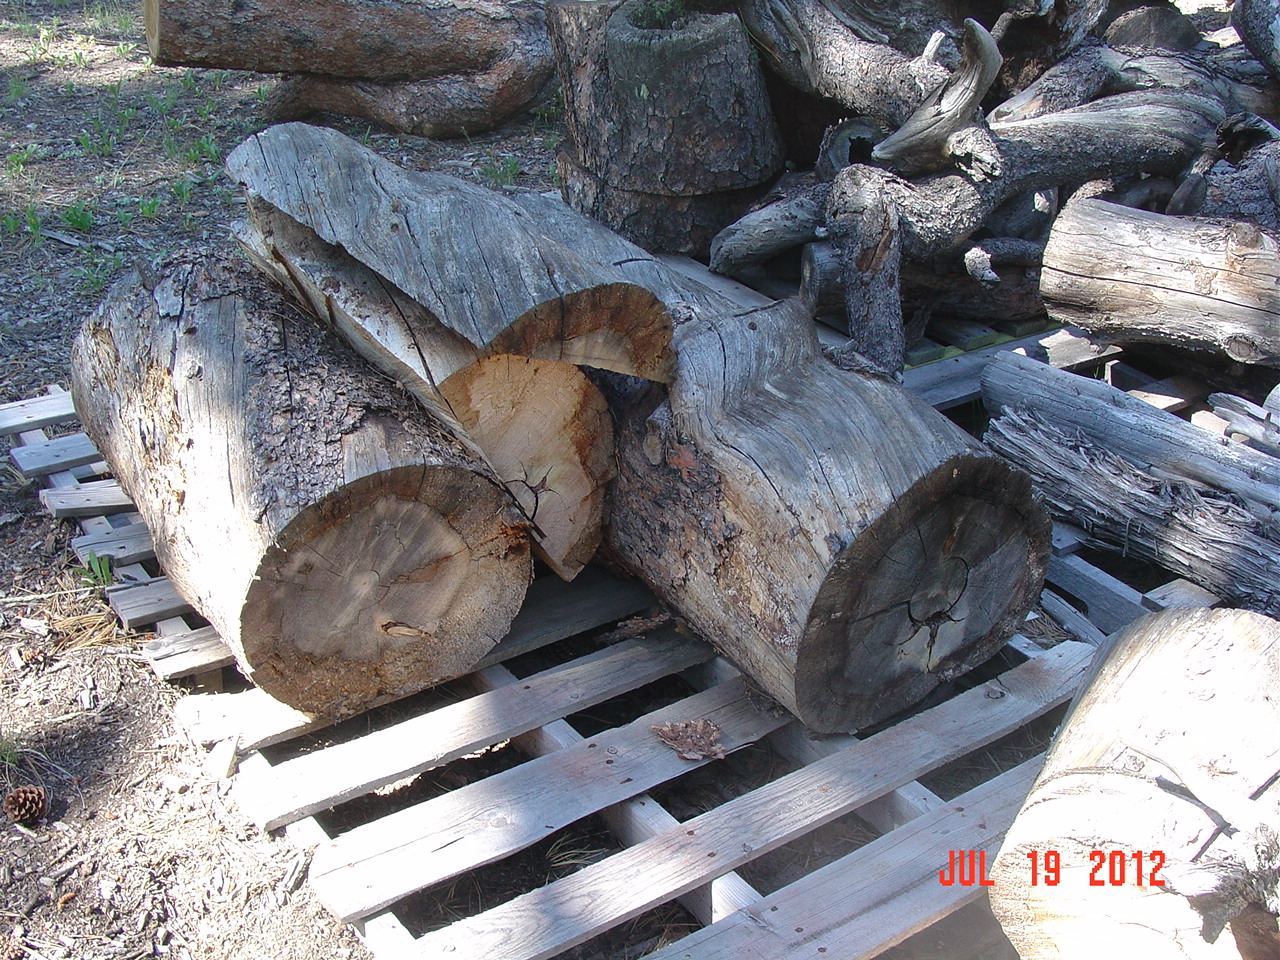
Started with some really "punky" rounds I slabbed off a coupla logs in my raw materials inventory. Here are the logs:


After slabbing off the rounds:


You can kinda, sorta see the "heartwood" is still good on most of the rounds. Will have to wait and see just how much will need to be ground off each piece in order to salvage anything from them. The hope is to save enough to show the blue stain of the beetles and to be able to flatten one edge on each piece and then join them together to make a very unique table top. We'll see how that one goes.


"Varnishing" leaves

Didn't know if this would work, but thought I'd give it a try anyway. The idea is to coat some leaves (or other vegetation as the mood strikes) with varnish in preparation for attaching them to slabs for "effect". After they are coated and applied to the slabs, they'll be covered with more coats of varnish to really seal them in.

The first effort was to use an artist's brush, varnish one side of the leaf and then the other. I won't even go into what an abject failure that was. Well, ok, maybe I will. Brushing one side at a time and letting it dry before being able to do the other side of the leaf had a tendency to make it curl - and I do mean curl. After I brushed the other side and let it completely dry, I had to put the leaf between wax paper and apply weight for a coupla days before it was flat enough again to even consider using it on a flat surface. There just had to be a better way.

The second effort, after my brain fart, was to "hang" the leaves from a rod using a loop of bale binder twine and a bobby pin (clothes pins will surely work better, but I didn't have any when I did this - so, off to the store to get some).

Still wasn't sure about whether or not doing both sides at once would prevent curling, but was very pleasantly surprised at how the leaves maintained their natural shape. The can you see in the photos is the spray varnish I used. It's a Minwax gloss water based polyurethane. If the leaves maintain their green color like I hope they will, I'll also be asking relatives out east to send me bags full of maple, oak, and walnut leaves this fall after they turn color for Autumn.

Once I apply these aspen leaves to some of my pieces, I'll post photos of them on my Facebook page: https://www.facebook.com/pages/Dead-Wood-Renaissance/361417090585685?ref=hl