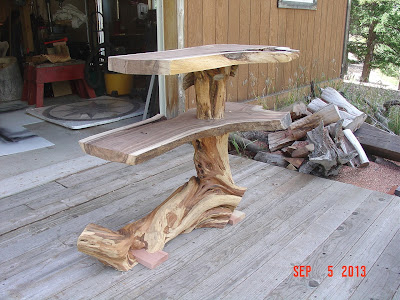
I think it's starting to actually look somewhat like a stand of some sort. Still a lot of tweaking to do, but getting there.
After the last post, it was time to "set it up"....well, sort of.
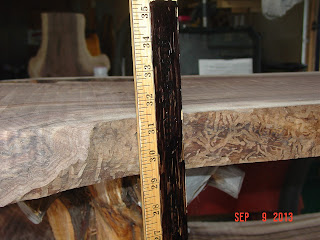
Still wasn't sure at this point what kind of base to set this whole thing on when done, so router planed another slab of walnut to see how it might look. Also, found a piece of scrap juniper laying around to use as the "spacer" between the two shelves to try to get an idea of how high this thing was going to stand.
Front and back photos below (you get to decide for yourselves which is actually front and back).
The problem: way too high (38" - want it to be about 30" when finished) and didn't like the slab underneath the whole thing at all - made it look way too bulky.
So, back to the old drawing board. Because the slab underneath it all was too bulky, I decided to see how some crosspieces might work as stabilizers. Some scrap pieces of 2x6 cedar came in really handy for this part because they were long enough, square enough, and "red" enough to blend in with the foundation. At least that's the hope. I'll also be doing some sculpting to help them blend even a little bit more before starting the finishing process.
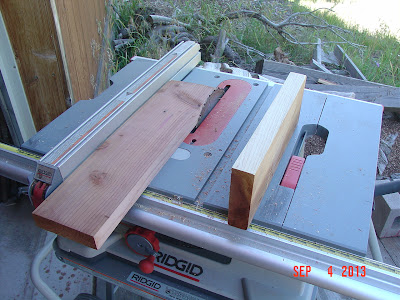
Laid it all out (photo below), and decided if this was the way to go, the cross pieces needed to be cut on the table saw to get them to a uniform width and thickness.
Once that was done, I realized they'd also need to be dado-ed into the bottom of the foundation piece. Otherwise, nothing was really gained by not using the slab concept.
This was the trickiest part of the process as far as I'm concerned. Getting everything set up to do the dadoes was time consuming because everything had to be on the level, and "guides" needed to be set up to keep the cuts very straight.
My first attempt at guides was to use a couple of pieces of scrap screwed into the bottom of the piece itself.
Still way too wobbly for my satisfaction. Looked around the shop for something else a little longer, and came up with a couple of shelf supports that I just screwed into the bottom. Had to make sure they were equidistant all the way along the cut, but these were VERY stable, and allowed repeated clean cuts to just the right depth.
When all was said and done, the crosspieces fit very snugly into the dadoes. They'll still get deck screws into the bottom to hold them even more securely, but that's just me....overkill.
Don't know if you can see it or not, but the crosspieces were still a little "proud" in the photo above. This required one more pass of the router planer to get them flush with the piece, itself (photo below). That's just another of the many reasons I really like this router planer setup - it allows for multiple, micro-adjusted cuts to get the right surface, no matter what and no matter the height of the piece itself up to 48".
Perfect! The only thing left on this part of the process is to sculpt the crosspieces a little so they actually blend into the overall "theme" of the stand - maybe in the next post......
The next step was to find a piece of juniper to serve as the spacer in between the two shelves. The first spacer I used for demonstration purposes was just too plain, and didn't speak to me at all. So, I went looking amongst my raw materials piles, and the piece below is the result. In order to secure this piece for planing both top and bottom, it had to be attached to a 2x6 first, and then the 2x6 had to be attached to the work surface, all by using deck screws. Otherwise, the first pass with the router would have sent this thing flying who knows where?
Made three passes with the router, and got it down to about 13" high. Didn't want to go too far on this side. Again, you can take stuff off, but once it's off it can't be put back.
Next step was to remove all the screws and re-secure the whole thing using the same process, but by flipping it upside down.
Took two passes to get it down to a height of 12" which was about all I wanted to take off at this point.
Once again, it's time to remove all the screws and see what this baby looks like set up sans connectors (hopefully, it won't fall over).
Wow, balances pretty well, I'd say! And, it's looking more and more like the TV stand it's supposed to be when done. Now I just need to see how high it stands.
Oops! It's still almost 8" too high at this point. Now it all boils down to whether to take all the extra from just one of the pedestal pieces or split the difference and take some from each in order to get down to the 30" height we want.
What do you think we should do?


