This is a really big piece, and it needed some work before planing, though. First of all, it sat kind of catty wompus after my eye-balling debacle:


 To get better balance while planing, I decided to cut off part of the main pedestal first. That way, I could tip the whole thing upside down and work on it with little to no movement or even fear of movement as the router was run back and forth over the piece.
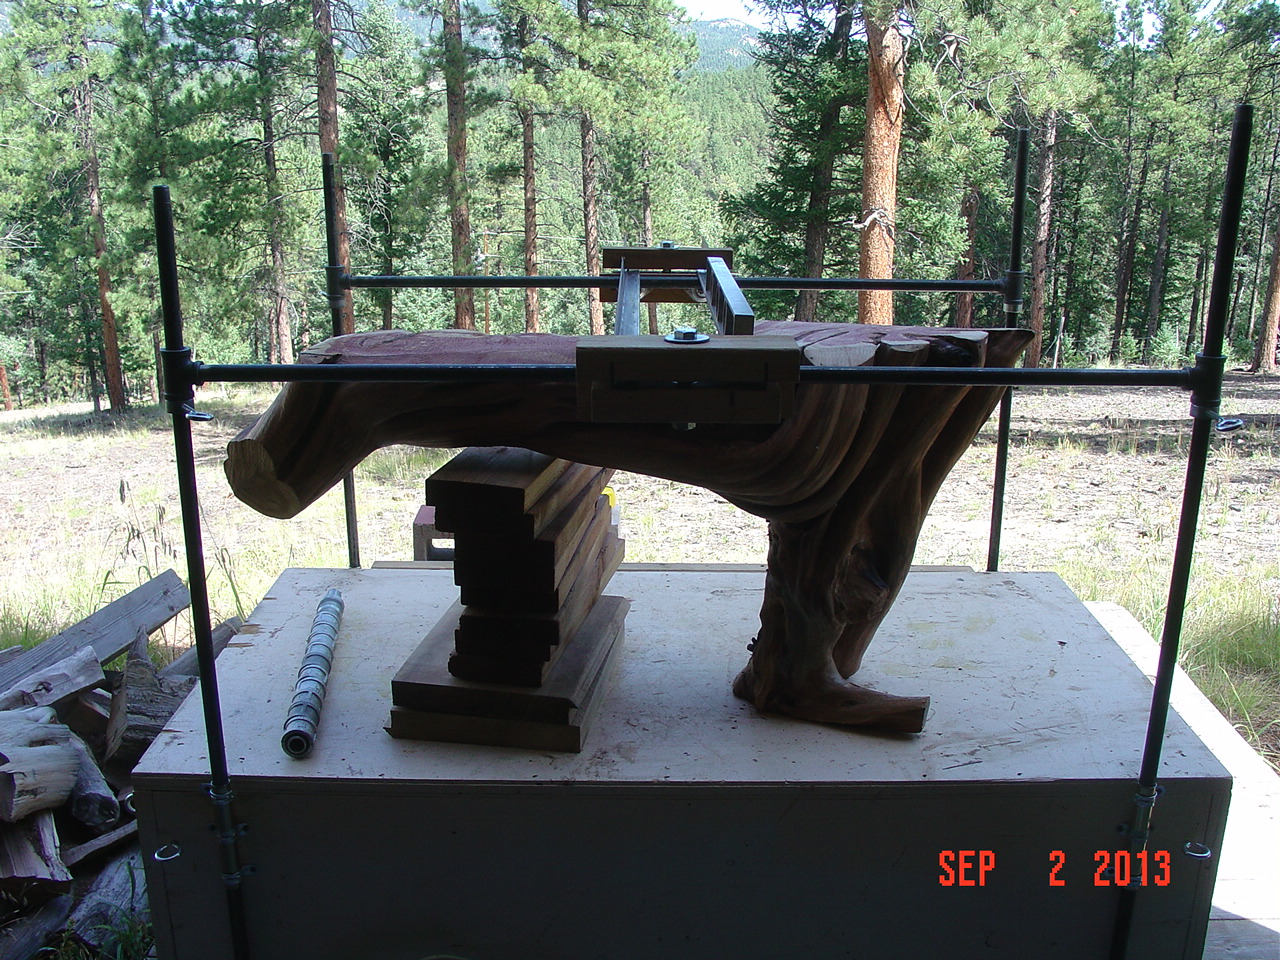
Now comes the fun part - setting up the planer, balancing the piece so it won't fall over during routing, and trying to get it as level as possible for the operation.
To start, I had to replace the shorter end pipes with 48" pipes to accommodate the height of the piece. Next step was to approximate the height of the rails so the planer would pass over the piece while still allowing the depth of the router to take some of the stock off in each pass.
Got the final fine tuning done on the height adjustment and made the first three passes (only 1/4" or less per pass so as to minimize the possibility of taking too much off.....can take a bunch off, but can't put it back if too much goes).

You can see in the photo below, there's about 3/4" between the runner of the sled and the piece itself. Depth of cut is only 3/4" on this router, so had to once again fine tune the height adjustment of the rails.

Put the level on it, and you can see in the photo below, it's still off slightly but not all that much or that bad.

So, I flipped the whole thing over and it sat really nice and flat for the final routing on the top of the piece.


A few quick passes with the router (this was a breeze simply because it is much smaller than the bottom of the piece), and the level shows an almost perfect flat top on which to place the lower of the two shelves to come.

No comments:
Post a Comment