Sunday, August 10, 2025

Gnarly North Dakota Twisted Red Cedar Lamp - Beginnings....


Well, I decided to switch gears a bit and try my hand at making a lamp sorta kinda like my Dad did waaaaaaay back in the day. My sister in North Dakota has possession of two of those lamps:


And I have possession of two more (only one is pictured because the other one is undergoing some repair after the base cracked and broke off). 


So, I guess it's safe to say my Dad was my inspiration for this and many other projects.

Anyway, the lamp I've now started working on is a very gnarly piece of North Dakota twisted red cedar I got from somewhere in the Badlands of western North Dakota (outside any parks, national or otherwise) many years ago before moving to Colorado. The photo shows it after it had been power washed. So, the gray color is kinda gone, but not completely.
 

Here's a pic of a piece I cut off that wasn't power washed. It'll help give an idea of what it looked like before going under the nozzle.

The difference between the twisted red cedar from North Dakota and the twisted juniper from Colorado that I've used in the past to make bowls and vases is the North Dakota twisted red cedar doesn't have any sapwood. It's red all the way through with some yellow striations (raw bottom of the lamp shows the red all the way through:

Juniper from Colorado has red heartwood with an outer layer of yellowish sap wood. Don't ask me why because I have no idea. 

Personal preference: Although the Colorado juniper has some very interesting and beautiful patterns that distinguish its character and beauty, for some reason I've always liked the solid red of the North Dakota variety a little better. Again, don't ask me why because it's just a personal preference. 

So, because the piece I'm working on now is very odd shaped, I had to figure out a way to flatten the bottom that had already been cut with a chainsaw leaving it a bit uneven. I used tie downs to hold it firmly in place upside down while using my router planer sled to flatten the bottom. It's not floating. It just looks that way from this angle.


Here's a better angle to show how the piece was secured.


This short video shows just how gnarly this kind of wood can be. 


After the piece was firmly secured by the tie-downs, I was able to run my router over it to get it flat.


This is the main feature of my router planer set-up that I like the most.....it's height adjustable to just about any height I may need for a project.

Finally, I took a couple of photos of the piece while it was still wet from power washing to get an idea of what it might look like after polyurethane is applied. I think I'm liking it a lot.


Pretty gnarly, eh?

DWR

Wednesday, July 2, 2025

The 'Process': Charcuterie Boards


"It's a sanded board with a finish". 

That's one of the comments I got when I posted photos of a finished walnut charcuterie board a few days ago in a group I belong to. I had mentioned I'd be sharing a blog post in the not too distant future showing the 'process' I'd gone through to get the end product. This is that blog post. I really hadn't planned on using that person's comment as my LEDE, but here we are.

I honestly don't know whether I should be offended or take it in stride or ignore it or laugh it off as someone trolling me. The more I thought about it, the more I felt I needed to follow through and offer something about the 'process' I use, negative comments notwithstanding. I've already talked about the process I used for a burl bowl I finished awhile ago (The 'Process': Burl Bowl), So, this time I'm sharing the process I use for making charcuterie boards.

Social media is awash with products that don't take a heckuva lot to make. Some are even mass produced. That's been pointed out to me on several occasions, too, kinda as a way to lowball me on pricing. Thing is, what I do between securing raw materials to make things and sharing the end result of the work that goes into making them isn't mass production. It isn't something where I go to a big box store and buy a slab of wood to make something out of it either. Rather, it's something I put my heart and soul into in order to make something someone can treasure as having been hand made. I also look at it as a way to help others do what I do if they're so inclined. By explaining and illustrating the process I use, maybe someone else can use the process I use to be more creative in theirs.

I use power tools, yes. But I don't have the big boy tools so many on social media have come to expect when viewing things like river tables, conference tables, cabinets, or any of the larger products that are out there. What I do isn't that at all. Plus, I'm OLD and retired. So, when someone belittles, ridicules, or trolls me, I tend to get my shorts in a knot simply because I'm OLD and a bit crotchety sometimes. But I digress.

So, here's the thing: What I started with to make one charcuterie board (hopefully, I'll get at least four more out of the log this one came from) was a walnut log gifted to me by a friend.


The blue lines on the log are chalk lines I used as guides for my chainsaw in cutting the log into slabs.


That was actually a few years back when I was a lot younger. I won't do that again at my age now.


The slab on the ground in the above photo was the one I selected to make the first of what I hope will be more charcuterie boards. It was about four feet long at this point and a little under three inches thick.


The slab was also very rough from using a chainsaw to cut it. That's where my router planer sled came in very handy.


Once the intact slab was flattened on both sides, I had to cut it in half to make the charcuterie board a usable size.


The section on the right in the photo above was the one chosen for this first charcuterie board. The one on the left is a crotch that will be used on the next board I make.

The sections were both too thick at this stage to just sand down and call it good. I guess I could have tried to slice the section in half like I did with another board I did awhile back.


But this section wasn't thick enough to begin with to do that. So, I used my trusty router planer sled again to plane down this board to a thickness of 1 1/4". Perfect for what I needed.

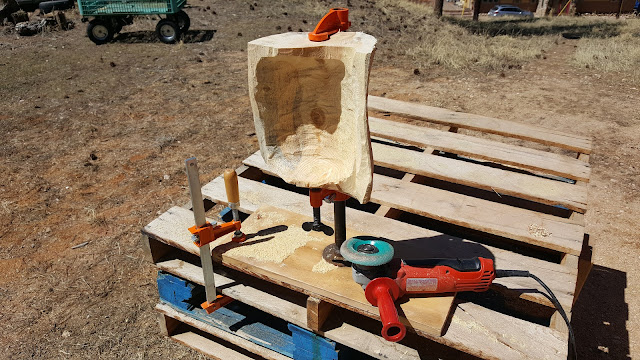
The next step involved grinding, shaping, and carving a bit to get the live edges cleaned up and any cracks shaved off before sanding could begin. For this, I used an angle grinder with a Kutzall grinding wheel to shape the edges (photo below shows the angle grinder and Kutzall grinding wheel I used to carve out a bowl I made) followed by a flap sanding wheel to smooth everything down to baby butt smooth.

After that, it became a matter of sanding everything down using multiple progressively finer grits of sandpaper and my random orbital sander to get to 220 grit, again to baby butt smooth.

Finishing involved one coat of Watco Danish Oil 'natural', one coat of Zinsser Dewaxed Shellac as a sanding sealer, two or three coats of Minwax spray semi-gloss polyurethane, and one coat of Trewax furniture wax.

I know some folks don't like using anything but 'food-safe' finishes for their boards. And that's ok. I just prefer my process instead, and did extensive research on the issue of the products I use being food-safe. Every subject matter expert I consulted on this issue said the products I use are food safe if given at least 30 days to fully cure, so there ya go.

Bottom line for me is that I don't keep tabs on how much time I spend doing what I do. If I did, I probably wouldn't be doing it (did I already point out that I'm OLD?). Reality is that there's a whole lot more involved with this process than simply buying, sanding, and finishing a board. For those who think this process is easy I can only hope that I've kinda sorta explained it well enough to understand that it isn't.....easy.

Plus, if I did keep tabs on my time involved, I'd have to charge way more than I do just to make a minimum wage equivalent. I do take solace in the fact that my efforts yield hand-crafted pieces I hope those who get them will appreciate, treasure, and maybe even pass down as family heirlooms.


Thanks for reading and perhaps challenging yourselves to do something similar.

DWR

Sunday, June 29, 2025

Handling Scammers


There have been a lot of folks worried about scammers on social media phishing for private information from crafters/creators/artisans. The problem is real. And, as time goes on, those scammers are getting a whole lot more sophisticated in manipulating people into falling for their scams. This blog post is all about how I've handled them in the past, and have been able to avoid falling into their traps thus far.

Whenever I get a private message from someone asking me if a piece I've posted is still available, I immediately become skeptical because if the post is still up, it means yes, the piece is still available. So, I proceed with caution from that point forward.

When I say yes, the piece is still available and they come back with asking me where I'm located, that's it. The conversation is over as far as I'm concerned. Bottom line is they don't need my location. That's phishing plain and simple.

If they ask what shipping costs, I tell them that depends on a number of factors, but shipping is always on top of the cost of the piece being shipped.

Their next question is usually whether I accept Venmo, Zelle, PayPal, Apple Pay, or something else. I tell them PayPal is the only one I accept at this time. Next, they usually ask me for my PayPal information. This is where my Spidey sense kicks in big time! 

Reality is anyone shipping anything anywhere should never give out their payment method information. It needs to be the other way around. If a scammer asks me for my information, I ask them to give me THEIR information. Most of the time, that ends it and I never hear from them again.

This next part is critical: If they give me their information, I tell them I'll get a shipping quote from the shipping company. I only use UPS, but I'm pretty sure every shipping company provides quotes. While I'm standing in the lobby of the shipping company, I text, the recipient the amount of the shipping quote and remind them that's in addition to the cost of the piece. I conduct my entire conversation with them through Facebook Messenger, never a phone text or email.

The next part is even more critical: If they agree to the total cost, I then send them a payment request through PayPal. Since they've already given me their phone or email attached to their PayPal account, PayPal takes it from there. As soon as I see a payment has appeared in my PayPal account, I give the UPS folks the go ahead to pack and ship the piece. You don't need to give anyone on the other end any personal information.

This method isn't 100% fool proof, but I have yet to have a scammer go all the way through MY process, and, once the payment appears in my PayPal account, that's it. They can't take it back.

I think the best piece of advice I can give to anyone wondering how to address the issue of scammers is to always be in control of the conversation. Back out if, at any point in the conversation you feel it may not be legit. In other words, pull the plug. You don't owe anyone anything. How long you stay in a conversation with someone depends on how long you're actually willing to allow them to string you along.

I hope this helps. It has worked very well for me thus far.

DWR

Monday, June 16, 2025

The 'Process': Burl Bowl


It's been a loooooooong time since I posted a blog post here mostly because I've transitioned to sharing a lot of how I do things to Facebook on my Dead Wood Renaissance page. The reason I'm posting here now is because I put a bowl (photos to follow) out on a 'crafts' Facebook page. One person suggested/recommended that I share some photos of the process I use to get finished pieces because people, as he said, need to see the process used to get to the end result in order to better understand what goes into making the pieces that I do. He's right. The art of hand crafted artisan work is getting lost in today's world of machine produced products. And that's the genesis of this post. So, here goes. 

The process I use is similar for almost all of the pieces I do, but not the same because no two pieces are ever identical. Bowls, vases, tables, candle holders are just a few of the things I've made. To see more photos of work I've done, I also have a Dead Wood Renaissance Instagram account, as well.

For my most recent piece, I started with a burl attached to a douglas fir tree trunk log. The bark was still intact in some spots, but loose in other areas of the log:

The tools I used to get the bark off are on the deck of my workbench in the photo above. Chisels and screwdrivers saved the day!

Once all the bark was removed, the next step was to try and come up with proper orientation. Not an easy task because my focus was on keeping as much of the burl intact as possible. In fact, I worried about keeping the burl solid and not carving into it at all. As you'll see later in this post, that option wasn't viable with the orientation I eventually ended up with.

Nothing I did seemed to be right for this piece. The last photo above is the initial orientation I came up with to make a sort of big vase......or so I thought.

After I decided to make a vase, the piece needed to be leveled on the bottom so it would be stable and not run the risk of constantly tipping over (that burl is heavy and kind of makes the piece top heavy). In order to do that, I got out my trusty router planer sled and let the levelling begin:


All the paraphernalia you see in the second photo above under the log was to kinda sorta level things off so the top (upside down in the photo) would be fairly level to accommodate the router as it planed the bottom of the vase level. This thing was really heavy, so I wasn't too worried about the router moving the piece as it was pulled and pushed in the sled over the top of the piece.

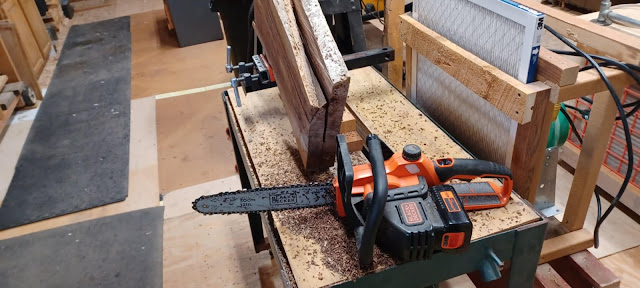
The next step was to hog out the center of the log. I started by trying to plunge cut with my little chain saw......too dangerous! Besides, I'm OLD and not as proficient with chain saws as I used to be. 

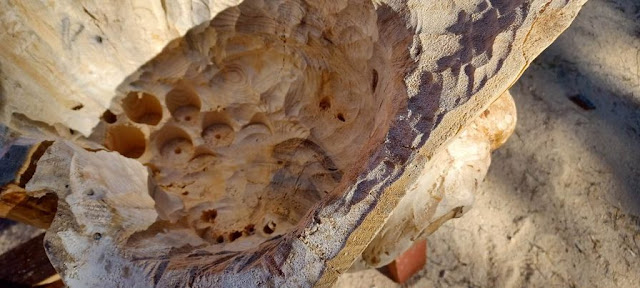
So, plan B.....use a spade bit in a drill to drill holes to different depths and get as much out of there as possible before using an angle grinder with specialty Arbor Tech carving attachment:


It was after this phase was done that I noticed how big a crack there was in the log. I mean, I noticed the crack before hogging out the log, but it seemed to become kinda unstable the more I hogged out, or so I thought.


That wasn't going to do for what I wanted at ALL!

So, I had to come up with a different orientation than originally planned, and I'm so glad I did! I turned it upside down, and started carving out a 'lip'.


From that point forward, it became a matter of rough carving followed by more finesse carving followed by rough sanding, followed by fine sanding followed by finishing. The tool I used to rough carve was the Arbor Tech planer shown in one of the photos above. For more fine carving, I used a Kutzall grinding disc (pictured below with another bowl project I did):


Sanding involves a variety of aggressive grit sandpaper followed in sequence by finer and finer sandpaper until it's smooth as a baby's butt. Well, not really, but close enough.

Finishing involves a sequence, too. Initial coat is rub on Watco Danish oil followed by a spray coat of Zinsser dewaxed shellac to help seal up the open end grain followed by multiple coats of Minwax semi-gloss polyurethane. Most of the time, I apply the poly by hand rubbing it on. Sometimes, in the more difficult to reach areas (nooks and crannies), I apply the poly using semi-gloss spray. Of course, there was sanding in between each and every coat.

The finished bowl:


And, some photos of the end result:


And there ya have it!

Folks continue to ask me how long it takes to do these pieces from start to finish. I almost always tell them if I kept track of how much time I've invested, I likely wouldn't do them at all!

Thanks for reading and looking.