It's been a loooooooong time since I posted a blog post here mostly because I've transitioned to sharing a lot of how I do things to Facebook on my Dead Wood Renaissance page. The reason I'm posting here now is because I put a bowl (photos to follow) out on a 'crafts' Facebook page. One person suggested/recommended that I share some photos of the process I use to get finished pieces because people, as he said, need to see the process used to get to the end result in order to better understand what goes into making the pieces that I do. He's right. The art of hand crafted artisan work is getting lost in today's world of machine produced products. And that's the genesis of this post. So, here goes.
The process I use is similar for almost all of the pieces I do, but not the same because no two pieces are ever identical. Bowls, vases, tables, candle holders are just a few of the things I've made. To see more photos of work I've done, I also have a Dead Wood Renaissance Instagram account, as well.
For my most recent piece, I started with a burl attached to a douglas fir tree trunk log. The bark was still intact in some spots, but loose in other areas of the log:
The tools I used to get the bark off are on the deck of my workbench in the photo above. Chisels and screwdrivers saved the day!
Once all the bark was removed, the next step was to try and come up with proper orientation. Not an easy task because my focus was on keeping as much of the burl intact as possible. In fact, I worried about keeping the burl solid and not carving into it at all. As you'll see later in this post, that option wasn't viable with the orientation I eventually ended up with.
Nothing I did seemed to be right for this piece. The last photo above is the initial orientation I came up with to make a sort of big vase......or so I thought.
After I decided to make a vase, the piece needed to be leveled on the bottom so it would be stable and not run the risk of constantly tipping over (that burl is heavy and kind of makes the piece top heavy). In order to do that, I got out my trusty router planer sled and let the levelling begin:
All the paraphernalia you see in the second photo above under the log was to kinda sorta level things off so the top (upside down in the photo) would be fairly level to accommodate the router as it planed the bottom of the vase level. This thing was really heavy, so I wasn't too worried about the router moving the piece as it was pulled and pushed in the sled over the top of the piece.
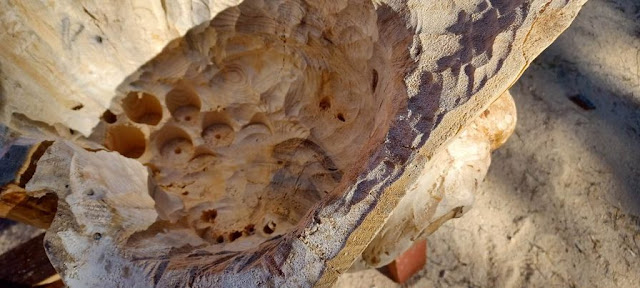
The next step was to hog out the center of the log. I started by trying to plunge cut with my little chain saw......too dangerous! Besides, I'm OLD and not as proficient with chain saws as I used to be.
So, plan B.....use a spade bit in a drill to drill holes to different depths and get as much out of there as possible before using an angle grinder with specialty Arbor Tech carving attachment:
It was after this phase was done that I noticed how big a crack there was in the log. I mean, I noticed the crack before hogging out the log, but it seemed to become kinda unstable the more I hogged out, or so I thought.
That wasn't going to do for what I wanted at ALL!
So, I had to come up with a different orientation than originally planned, and I'm so glad I did! I turned it upside down, and started carving out a 'lip'.
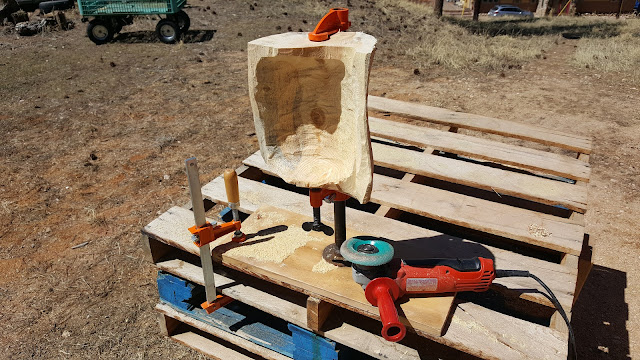
From that point forward, it became a matter of rough carving followed by more finesse carving followed by rough sanding, followed by fine sanding followed by finishing. The tool I used to rough carve was the Arbor Tech planer shown in one of the photos above. For more fine carving, I used a Kutzall grinding disc (pictured below with another bowl project I did):
Sanding involves a variety of aggressive grit sandpaper followed in sequence by finer and finer sandpaper until it's smooth as a baby's butt. Well, not really, but close enough.
Finishing involves a sequence, too. Initial coat is rub on Watco Danish oil followed by a spray coat of Zinsser dewaxed shellac to help seal up the open end grain followed by multiple coats of Minwax semi-gloss polyurethane. Most of the time, I apply the poly by hand rubbing it on. Sometimes, in the more difficult to reach areas (nooks and crannies), I apply the poly using semi-gloss spray. Of course, there was sanding in between each and every coat.
The finished bowl:
And, some photos of the end result:
And there ya have it!
Folks continue to ask me how long it takes to do these pieces from start to finish. I almost always tell them if I kept track of how much time I've invested, I likely wouldn't do them at all!
Thanks for reading and looking.


No comments:
Post a Comment